The factory installed light switches in our 2022 Forest River Sabre 36BHQ presented a problem for the Metaphysical.Family crew. Read on to learn what the problem was, and how we solved it by replacing RV light switches.

Our 2022 Forest River Sabre 36BHQ came from the factory with illuminated light switches. This is actually a really great feature. The illuminated switches are quickly and easily located in the dark of night.
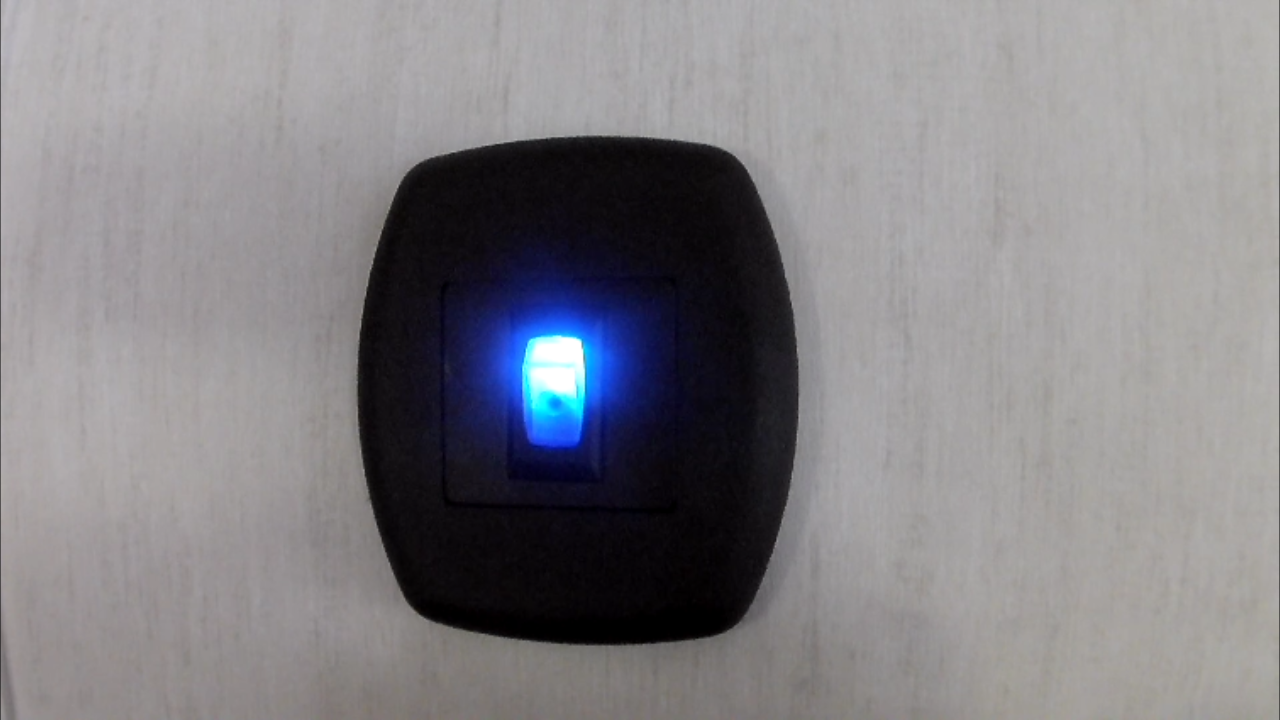
Blue Light Sensitivity
The problem is that Forest River installed blue switches. We do not know the reason Forest River chose blue light switches (perhaps because ours is the cobalt edition?), but we do know that blue light makes it hard for some persons to sleep.
The lady of the house inquired about changing the color of the lights in the switches. This isn’t possible because the LED inside the switch is white shining through whatever color plastic the switch is made from. A blue switch lights up blue, a red switch lights up red. But I was sure that we could change the color of the plastic by replacing RV light switches.
All of the lights in our RV are 12V DC. All of the light switches in our RV are automotive style normally open rocker switches, with an LED inside. When wired with 12V and ground (two wires) the LED inside the switch will illuminate when the switch is turned on. When wired with a 12V to the extra pin on the switch (three wires), the LED inside the switch will be illuminated all the time. This is what gives us the light up switch that’s easy to locate in the dark.
Replacing RV Light Switches
Replacing the switches is a snap (heh).
- Gently remove the snap on cover plate from the switch
- Remove the screws holding the switch plate to the wall
- Depress the retaining tabs on the top and bottom of the switch, pushing the switch out of the mounting plate.
- Slide the mounting plate down the wires and out of the way.
- Locate the polarity markings on both switches
- Optional: Take a picture of the wires for reference before proceeding
- Carefully move the wires from the old switch to the new switch. Move only one wire at a time to prevent mistakes.
- Make sure the switch illuminates, and functions. If it doesn’t, go to your fuse box and replace the fuse that you’ve blown.
- Slide the mounting plate back down the wires and install the new switch into the mounting plate.
- Re-attach the mounting plate to the wall using the screws you removed earlier
- Snap face plate back on switch mounting plate
- Enjoy your new red light switch
Products in this post
 | RV Designer S247, Rocker Switch, 10 Amp, Illuminated On / Off, SPST, Black w/ Red, DC Electrical |