Is it possible to run all the systems in a large fifth wheel RV without a 50 amp shore power connection? Yes it is! In this post we talk about our RV’s electrical system powered by Victron Energy, Rich Solar and SOK Battery.
When we purchased our RV we already knew that we wanted to install enough power equipment that we could go “boondocking”. The goal was to be able to have all the amenities available as when in a campground with a full 50 amp grid connection.
And so, I jumped head first down the off-grid/solar rabbit hole with absolutely no concept for how deep the hole went.
Briefly – an off-grid power system is made up of the following components:
- Factory Installed “Solar Prep”
- Batteries – These store Direct Current (DC) power used by the rest of the system.
- Inverters – These devices take DC power out of the batteries and convert it to Alternating Current (AC) power to run household appliances – air conditioners, microwave, TV, etc.
- Solar panels – (optional) These devices generate DC power from sunlight to quietly replenish depleted batteries.
- Solar Charge Controller – These devices receive power from the solar panels and control how much of that power to send to the system.
- Generator – (optional, but recommended) These devices generate AC power from gasoline or diesel which can be used (through the inverter/charger) to replenish depleted batteries.
- The Glue – The rest of the components can be lumped together under “glue” that makes the system work. This includes wiring, battery cables, bus bars, shunts, disconnect switches, etc.
- Lessons Learned – Things we have learned after living with this system for a few months
- Full Installation Manual – How to purchase an installation manual for this system
Factory Installed “Solar Prep”
We were excited that our RV came with what Forest River calls the “Juice Pack”. Unfortunately, as with the “Cellular Hotspot Prep” and the “Polar Shield” pack, the “Juice Pack” is mostly a marketing gimmick.
The “Juice Pack” consists of a single 50 watt panel on the roof of the RV. A 50 watt panel provides about 4 amps of 12v DC on a day with full sun. It is effectively a trickle charger for the house batteries. Other RV manufacturers may provide more or better components in their “solar prep” kits, but expect to replace much or all of the equipment. We removed every component of the Juice Pack while installing our proper solar setup.
Batteries
We knew that we wanted to upgrade to Lithium (LiFePO4) batteries to replace the factory installed lead-acid batteries.
Lead-acid batteries can only be discharged to 50% before damaging them. We had two installed for ~200 amp hours capacity, but only able to discharge to half that. This means that with two 100amp hour lead acid batteries, you only have 100 amp hours of usable capacity.
We replaced the lead-acid batteries with three 206 amp hour SOK LiFePO4 batteries. Lithium batteries can be discharged completely without damaging the battery. This results in a total usable capacity of ~620 amp hours.
Lithium batteries are also much lighter per amp hour than their lead acid counterparts. This weight savings will be used by other components of the off-grid solar power system.
Inverters
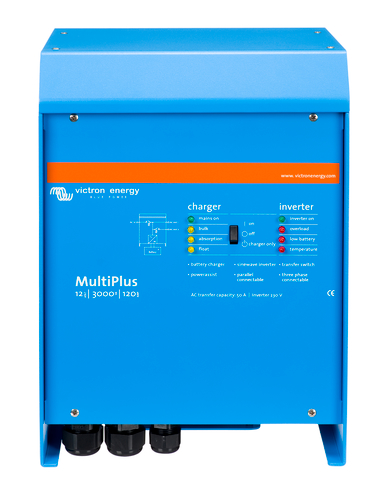
Photo courtesy victron.com
For inverters we chose to use two Victron Multiplus 12/3000/120-50 inverters. These inverters are 12 volt on the DC side, can provide 3000 volt-amps of 120 volts on the AC side, and can pass through up to 50 amps of 120v shore power. As our RV is designed around 50 amp service with a split breaker box, we wanted to put one inverter on each leg of the 50 amp service to the breaker box.
3000 volt-amps works out to about 25 amps of usable inverter power. This means that we do not have all the electrical capabilities that we have when hooked up to a 50 amp shore power connection. This means that we have to be mindful of how much demand we are placing on the inverters when not connected to shore power. For example – we can not run the air conditioner and the microwave at the same time without putting the inverter serving that side of the breaker box into overload mode.
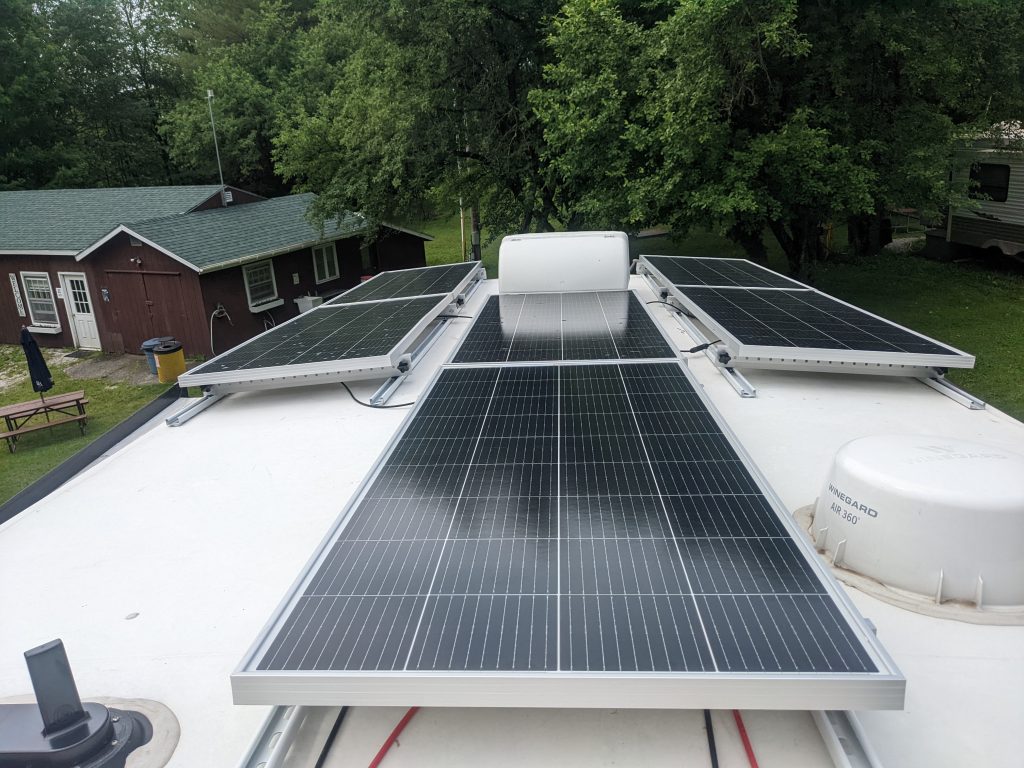
Solar Panels

Photo courtesy Rich Solar / Shopify
We use solar power to recharge the batteries when off-grid. This power is generated by our solar panels. These were installed on the roof using strut channel and tilt brackets. I can not take credit for this installation method. I got the idea from the Travel New Trails youtube channel. I modified his method slightly and am really happy with the result.
We installed six 200 watt panels from Rich Solar. The panels are arranged in two arrays of 600 watts each. These panels are 12 volt panels with a working voltage around 20 volts @ 10 amps. We wired the panels in series for ~60 volts @ 10 amps. The full specifications for these panels are as follows:
| Maximum Power(Pmax) | 200 Watts |
| Maximum Power Voltage(Vmp) | 20.4 Volts |
| Maximum Power Current(Imp) | 9.80 Amps |
| Open Circuit Voltage(Voc) | 24.3 Volts |
| Short Circuit Current(Isc) | 10.2 Amps |
| Maximum System Voltage(Vmax) | 1000 Volts DC |
| Weight | 26.5 lbs |
| Dimensions | 58.7 x 26.8 x 1.4 inches |
Solar Charge Controllers
.png)
Photo courtesy victron.com
The factory installed charge controller did not support LiFePO4 batteries. This meant that we needed to replace it with better equipment. Here we opted for two Victron Smart Solar MPPT charge controllers in 100/50. We did this so that we could run two strings of 200 watt panels with 600 watts on each charge controller. This gives us a total of 1200 watts of solar.
The 100 in the product specification indicates that this charge controller can accept 100 volts input current MAXIMUM. Victron is very clear that input voltage higher than the stated rating will damage the unit, and that they will not warranty the unit for failure due to over-voltage. Our solar arrays are only capable of providing ~60 volts input, so we should never exceed this input rating. The 50 in the product specification indicates that this charge controller can provide 50 amps of 12 volt DC output at maximum.
Our two strings of solar panels can each provide 50 amps of 12v DC to recharge the batteries, or 100 amps total. Solar panels rarely operate at 100% efficiency, but we have seen as much as 90 amps in real world testing.
Generator

Photo courtesy harborfreight.com
We carry a 3000 watt generator/inverter on our RV travels. The reason for this is that there are many factors that degrade the performance of our solar array. RV orientation, shade from trees or even clouds on an otherwise sunny day can all greatly decrease solar power output. Having the generator along ensures that we can always have 3000 watts of power available to recharge our batteries.
The downsides to a generator are that they take up valuable cargo space and weight. They also require fuel to operate. Some RV destinations do not allow visitors to operate a generator. Generators are much louder than solar power, and they produce toxic fumes. Generators can also provide power at night and during a rainstorm though, so they are worth consideration.
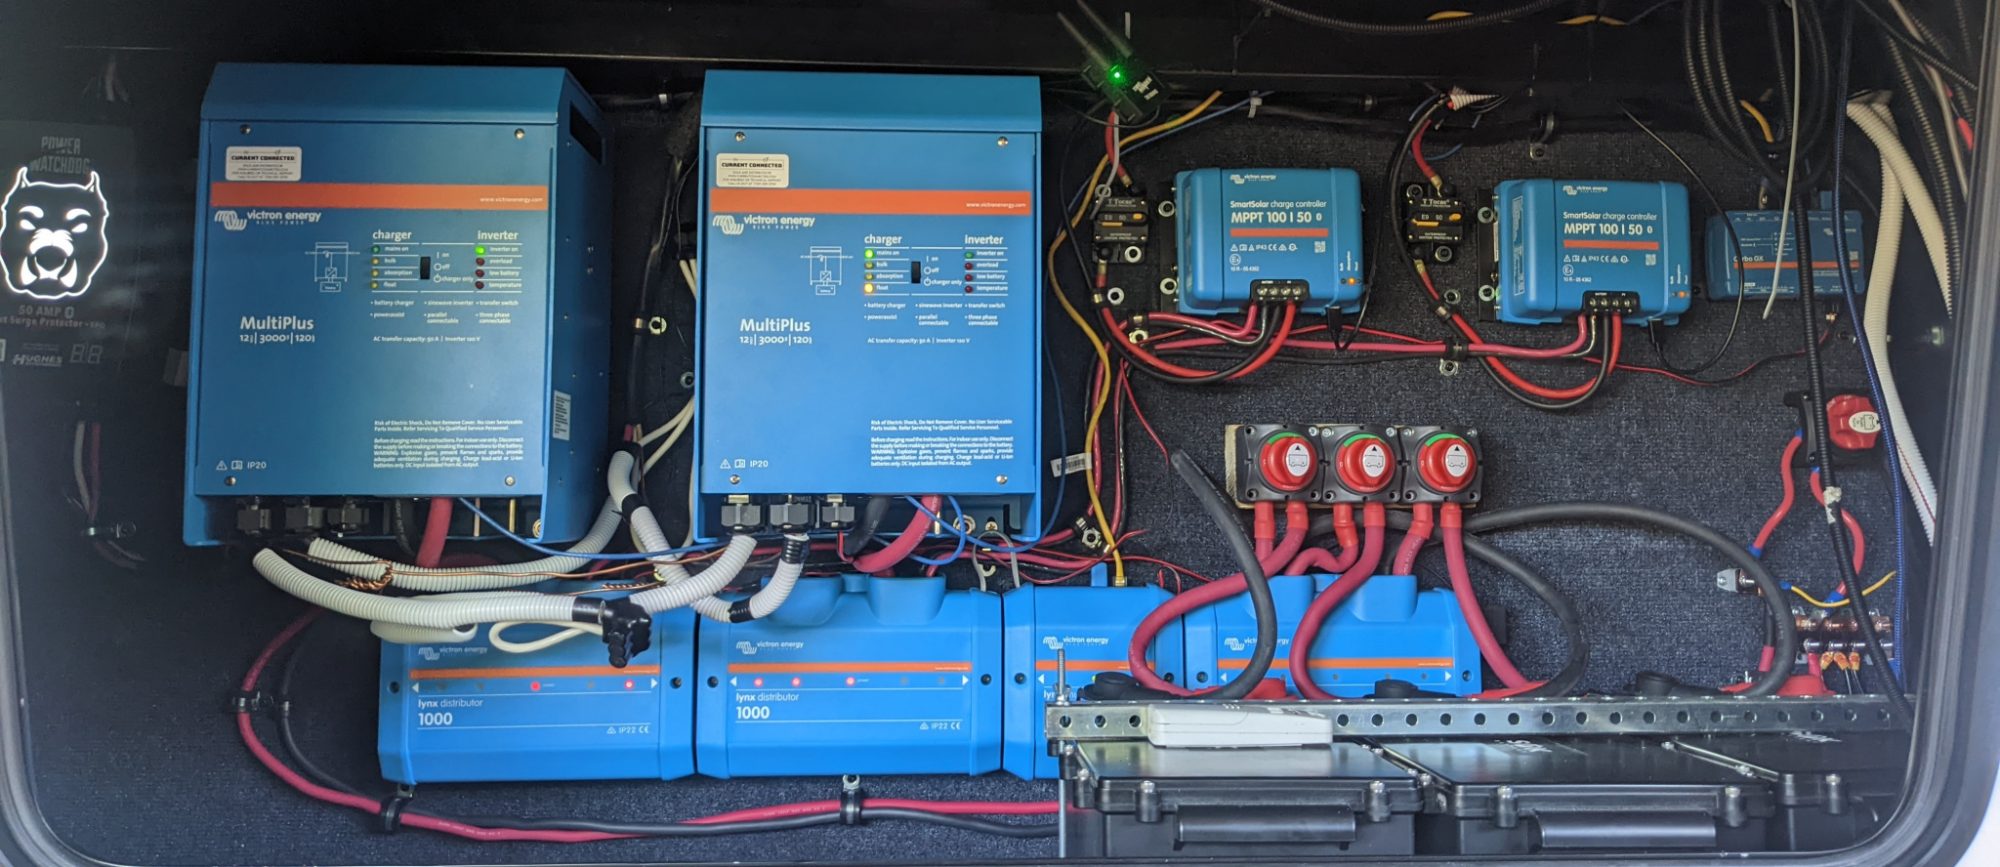
The Glue
The rest of the system installation was largely wiring all of the components together.
The “Juice Pack” wasn’t a total loss. We were able to use the factory installed wiring to pull the new wiring through the ceiling and down the wall inside the RV. The factory installed wiring was only 12 AWG, which would not have been heavy enough to carry 500 watts of solar. We replaced it with two runs of 10AWG solar wire from BougeRV through the existing hole in the roof.
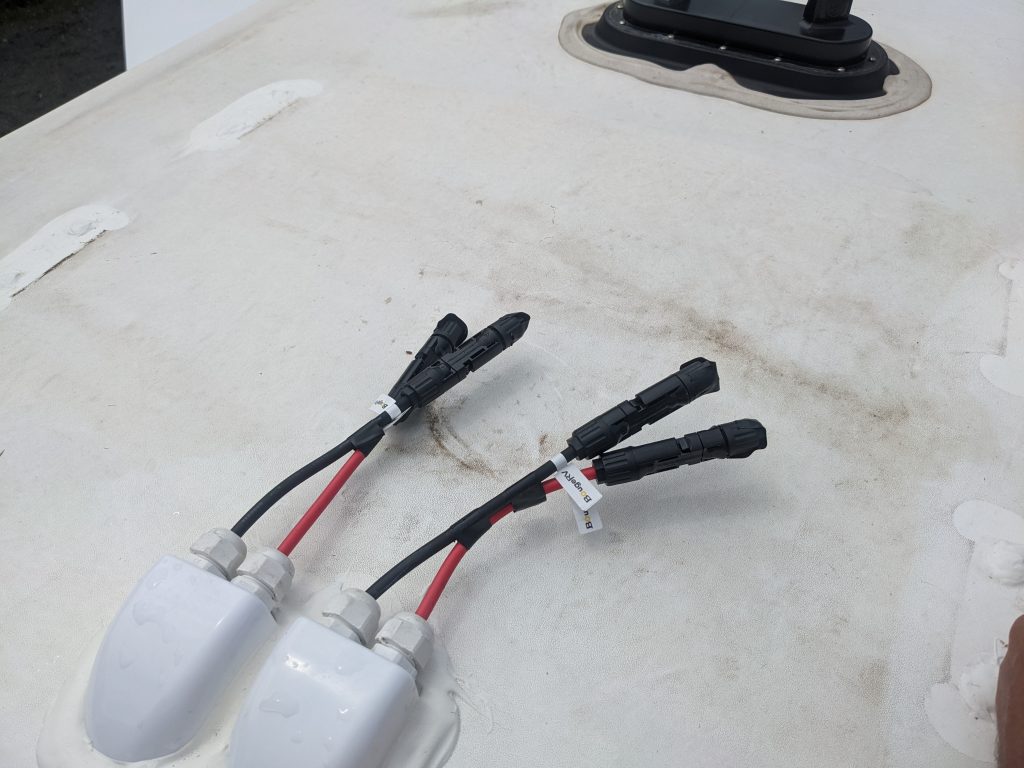
From there we ran the wires down the wall in the factory location. We removed the paneling on the wall to gain access.
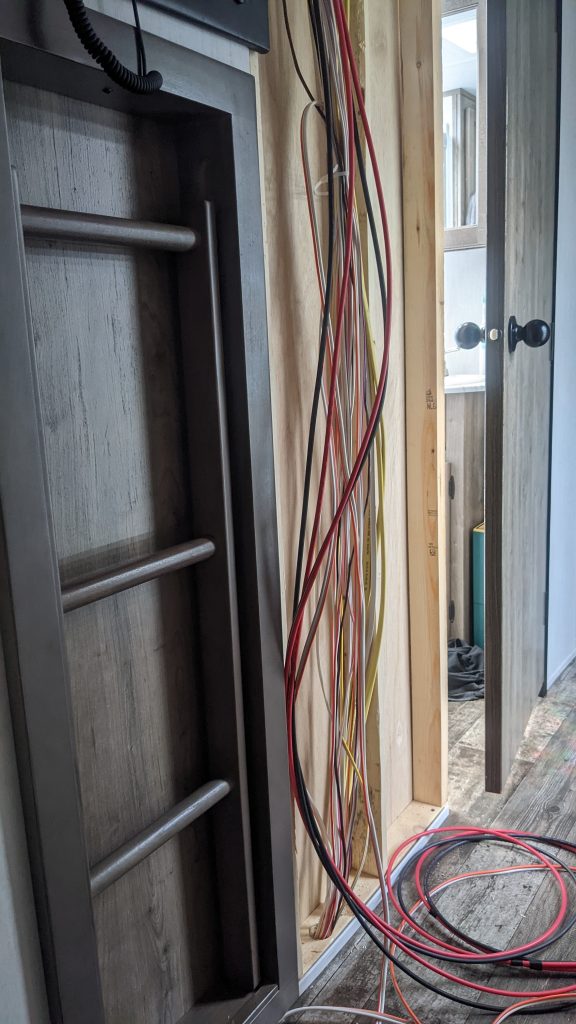
After the wiring was run down the wall we ran it through the basement and into the frame box where the factory wiring had been. The wiring terminates in the front bay of the RV where the batteries were installed at the factory.
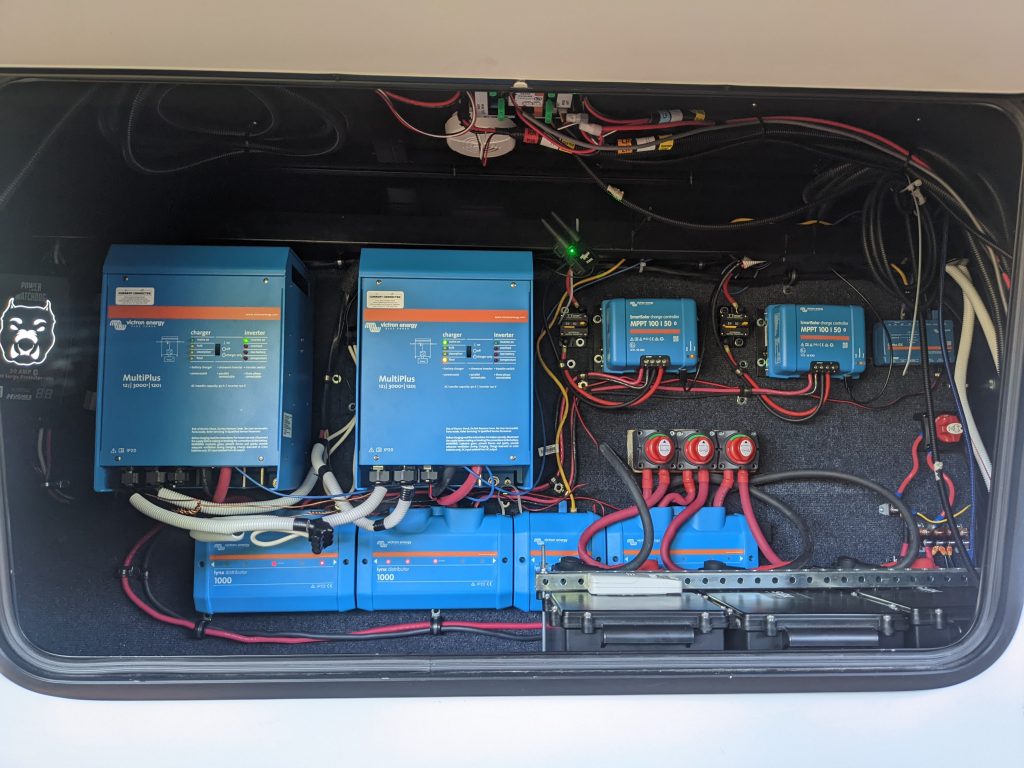
With all the wiring ran from the roof it was time to start wiring the system together. We made all of the battery cables, as well as all the wiring between the components. The exception to this was the communication cables between components. Victron recommends using pre-made cables for these connections.
Tying it all together is a Victron Lynx Power In, a Victron Lynx smart shunt and two Victron Lynx Distributors. The Lynx system is basically a 1000 amp capable battery bus bar. The batteries are connected to the Power In. From there the power flows through a 500 amp main fuse in the smart shunt, and then into the Lynx Distributors. Each connection in the Distributor is fused appropriately for the device connected.
Lessons Learned
When we are at a campground with full 50 amp shore power the inverters simply pass that shore power through to the breaker box in the RV. In this case the inverters and solar panels do not have much to do because we are pulling the power that we need from the shore connection when we need it.
When we are at a campground with a 30 amp shore power connection the situation changes. Because the inverter/chargers are programmed in a split-phase pair only the primary inverter passes through shore power. This means that only half of the RV’s breaker box is being serviced by shore power. The other half – serviced by the other inverter – is being powered by the batteries. This is because the secondary inverter does not pass through the shore connection.
While we are able to run everything in our RV without a shore connection, we learned quickly that there are limitations. For example, 1300 watts going to the air conditioner with 1500 watts going to the microwave/convection oven is enough to make the inverter servicing that line unhappy. The inverter will power both devices for a time, but will eventually go into overload and reset. Because the two inverters are in a split-phase pair, this causes both inverters to shut down. It’s only a minor inconvenience, but something that must be remembered.
Full Installation Manual
We are in the process of writing an installation manual for the system outlined above. The manual presents all of the information you would need to install this system yourself complete with pictures, wiring diagrams, etc. If you would like to be emailed when this manual becomes available please enter your name and email address into the form below.
Sam, you are a lifesaver. I was about to go with the 2×120 Mutiplus II that I purchased (after I bought the two 24/3000 Multi’s that I could no longer return) and I got your response today (5/2/2023). Now, I can proceed with the planning to replace my AIMS-based RV solar solution (Inverter/Charger and Solar Charge Controllers) and replace with my new Victron-based system (2 Multi’s, 2 smart charge controllers, GX and all the ‘glue’ items to make it sound.
That’s great Ted! Glad I could help you out.
Thank you for the kind comment!